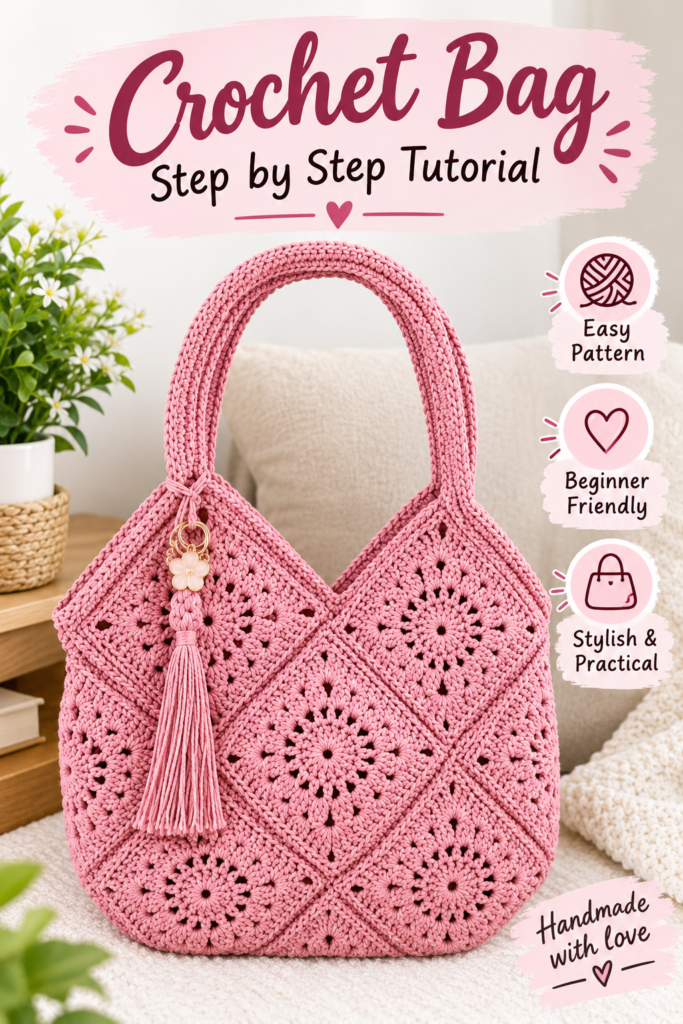
A handmade bag can be practical, beautiful, and surprisingly simple to make. This crochet bag pattern combines classic granny squares with a sturdy construction to create a stylish market bag that works just as well for everyday errands, shopping, or casual outings.
If you love traditional crochet but want something modern, a granny square bag pattern is a great place to start. The individual squares are easy to customize with different colors, while the finished crochet purse has plenty of personality without requiring complicated shaping.
In this guide, you’ll learn how to plan your bag, choose the right yarn and hook, make the granny squares, join the pieces, create comfortable handles, and add finishing touches for a polished women bag you can use again and again.
Why Make a Granny Square Crochet Bag?
Granny squares have remained popular because they are versatile, beginner-friendly, and easy to customize. Instead of crocheting one large piece, you create smaller motifs and join them together.
This makes a granny square crochet bag pattern particularly convenient.
You can:
- Use one color for a minimalist look.
- Combine two or three shades for a coordinated design.
- Use leftover yarn for a colorful patchwork bag.
- Make the squares larger or smaller depending on the desired bag size.
- Add tassels, charms, buttons, or other decorative details.
- Create matching accessories such as a small crochet pouch or wallet.
The result can be a casual crochet purse, reusable shopping bag, or handmade gift.
Materials for a Crochet Market Bag
Before starting your project, gather your basic crochet supplies.
Yarn
Choose a medium-weight cotton or cotton-blend yarn for a practical market bag. Cotton is particularly useful because it produces a relatively firm fabric and is suitable for an everyday accessory.
For a softer fashion bag, a cotton-acrylic blend can also work well.
Choose colors according to the style you want:
- Dusty pink and cream: soft and feminine
- Black and beige: classic and neutral
- Sage green and ivory: natural and modern
- Bright multicolor: playful and colorful
- One shade: clean and minimalist
Crochet Hook
Use the hook size recommended on your yarn label as a starting point. If your stitches are too loose, try a smaller hook. If the fabric feels excessively stiff, a slightly larger hook may be more comfortable.
The most important thing is to create a fabric that is firm enough to support the contents of your bag.
Other Supplies
You may also need:
- Yarn needle
- Scissors
- Stitch markers
- Measuring tape
- Optional lining fabric
- Optional magnetic snap or button
- Optional decorative charm
- Optional beads or tassel materials
How to Plan Your Granny Square Bag
A little planning before crocheting can save considerable time later.
First decide how large you want your finished bag to be. Then choose the number and size of granny squares needed to create the front, back, and sides.
For example, you could create a medium-sized bag using several matching squares arranged in a diamond-style layout. Larger squares will produce a bolder pattern, while smaller squares create more individual color and texture.
Before joining anything permanently, place your finished squares on a flat surface and experiment with different arrangements.
This is especially useful when working with multiple colors.
How to Make the Granny Squares
The classic granny square begins in the center and grows outward in rounds.
Step 1: Create the Center
Begin with a magic ring or a small chain ring.
Work your first group of stitches into the ring, then close the center according to the stitch pattern you’re following.
The center can be a contrasting color if you want the flower-like appearance seen in many modern granny square designs.
Step 2: Build the First Round
Work groups of stitches separated by chain spaces.
These spaces create the characteristic openings in the granny square and form the foundation for the corners.
Keep your tension consistent so the square remains flat.
Step 3: Add Additional Rounds
Continue working around the square, increasing at each corner.
With each round, the square becomes larger.
If you’re changing colors, fasten off neatly at the end of each round and weave in the ends as you go. Leaving all the ends until the very end can make finishing considerably more time-consuming.
Step 4: Check the Shape
After several rounds, place the square flat.
A good granny square should lie relatively flat without excessive curling or rippling.
If the square is becoming wavy, your tension or stitch count may need adjustment. If it is curling significantly, check whether you are using the appropriate hook size and following the pattern correctly.
Joining the Granny Squares
Once you’ve made all your squares, the next stage is assembling the bag.
There are several ways to join crochet motifs.
Whip Stitch Join
A needle and yarn can be used to sew the squares together.
This method creates a visible seam and is relatively straightforward.
Slip Stitch Join
A crochet hook can be used to connect the motifs with slip stitches.
This can create a more structured seam and allows you to work entirely with crochet rather than switching to a sewing needle.
Flat Crochet Join
A flatter joining technique can produce a neat, decorative seam between squares.
The best joining method depends on the look you want and how much structure you want the finished granny square bag pattern to have.
Tip: Keep your joining tension consistent. Pulling one seam much tighter than another can cause the finished bag to become uneven.
Building the Market Bag
After joining the main motifs, fold and connect the pieces to create the body of the bag.
Pay particular attention to the corners and bottom seams because these areas experience more stress when the bag is being used.
For a stronger crochet market bag, consider adding an additional border around the top opening.
A few rounds of firm stitches can help stabilize the edge and create a clean foundation for the handles.
Making Strong Crochet Handles
The handles are one of the most important parts of an everyday bag.
A beautiful bag can become uncomfortable if the handles stretch too much.
For a stronger handle:
- Mark the attachment points evenly on both sides.
- Crochet a wide handle rather than a very thin strap.
- Work several rows to create thickness.
- Reinforce the connection between the handle and bag.
- Weave the yarn ends securely through multiple stitches.
You can also create a separate strap and sew it firmly to the inside of the bag.
For a shoulder-style crochet purse, make the strap longer. For a handbag, use a shorter handle that sits comfortably in your hand or on your forearm.
Adding a Decorative Tassel
A tassel is an easy way to personalize a handmade bag.
Use yarn that matches the bag or choose a contrasting shade.
Wrap yarn around a small piece of cardboard several times, tie the top securely, cut the bottom loops, and wrap another piece of yarn around the upper section to form the tassel shape.
Attach it to the bag using a sturdy loop.
A small metal charm, flower charm, or wooden bead can also be added for extra detail.
How to Make Your Crochet Bag More Durable
A handmade bag needs to withstand movement, weight, and repeated handling.
Use these practical tips:
- Choose sturdy yarn rather than extremely delicate fibers.
- Avoid making the fabric excessively loose.
- Reinforce the bottom corners.
- Reinforce handle attachment points.
- Weave yarn ends securely.
- Consider adding a fabric lining for extra support.
- Avoid carrying substantially more weight than the bag was designed for.
A lining is especially useful if you plan to carry small objects that could fall through the open spaces of granny squares.
Adding a Fabric Lining
A lining can transform a decorative granny square bag into a more practical everyday accessory.
Measure the inside of the completed bag and cut your fabric slightly larger than the finished interior measurements to allow for seams.
Sew the lining into a simple pouch shape, then attach it carefully to the inside of the crochet bag.
You can add:
- An interior pocket
- A zipper
- A magnetic snap
- A small key loop
A lining isn’t essential for every market bag, but it can give a softer crochet fabric additional structure.
Crochet Bag Color Ideas
Color is one of the easiest ways to make the same pattern look completely different.
Soft Feminine Palette
Try:
- Dusty pink
- Blush
- Cream
- Light mauve
This combination works beautifully for a delicate women bag.
Neutral Everyday Palette
Try:
- Beige
- Taupe
- Cream
- Brown
This creates a versatile bag that can work with many outfits.
Modern Color Combination
Try:
- Sage green
- Off-white
- Terracotta
- Warm brown
The earthy shades give the traditional granny square a contemporary appearance.
Bright Patchwork
Use several contrasting colors for a cheerful summer market bag.
This is also a great way to use leftover yarn from previous crochet projects.
Common Crochet Bag Mistakes to Avoid
Even a simple pattern can produce problems if the construction is overlooked.
Uneven Granny Squares
If some squares are noticeably larger than others, joining them can become difficult.
Solution: Check your measurements regularly and maintain consistent tension.
Handles That Stretch
Thin crochet handles can stretch under weight.
Solution: Make the handles wider and reinforce their attachment points.
Weak Seams
The bottom seam receives considerable stress.
Solution: Use a strong joining method and reinforce the corners.
Too-Loose Stitching
Very loose stitches can make the bag less stable and allow small objects to fall through.
Solution: Adjust your hook size or add a lining.
Leaving All Ends Until the End
A large number of loose yarn tails can make finishing frustrating.
Solution: Weave in ends as you complete each section.
Crochet Bag Pattern Checklist
Before considering your bag finished, check the following:
- Granny squares are approximately the same size.
- Squares are arranged evenly.
- Seams are secure.
- Bottom corners are reinforced.
- Top edge is neat and stable.
- Handles are securely attached.
- Loose ends are woven in.
- Optional lining is securely fitted.
- Decorative elements are firmly attached.
- Bag has been checked for comfortable handling.
Ways to Customize Your Crochet Purse
The basic design can easily become your own.
Consider adding a contrasting border around each square, changing the shape of the bag, or making the strap from a different stitch.
You can also experiment with:
- Flower-centered granny squares
- Solid granny squares
- Geometric color combinations
- Longer shoulder straps
- Short handbag handles
- Zipper closures
- Button closures
- Decorative tassels
- Crochet flowers
- Wooden or metal bag charms
For a more structured crochet purse, add a lining and a firm base. For a lightweight shopping bag, keep the construction simple.
Is a Granny Square Bag Good for Beginners?
Yes, particularly if you already know basic crochet stitches such as chains, slip stitches, and double crochet.
The granny square technique is repetitive, which makes it useful for practicing tension and stitch placement.
The more challenging part may be assembling the squares and constructing strong handles. Taking your time with those sections will make a significant difference to the finished bag.
How to Choose the Right Size
Think about what you want to carry before deciding on the dimensions.
A small crochet purse may only need to hold a phone, wallet, keys, and a few small essentials.
A larger market bag should have a wider body and stronger handles because it may carry groceries or other heavier items.
For a first project, a medium-sized bag is often a practical choice because it provides enough space to learn the construction without requiring a very large number of motifs.
Frequently Asked Questions
What yarn is best for a crochet bag?
Cotton and cotton-blend yarns are popular choices because they can create a sturdy fabric suitable for bags. The ideal yarn depends on the intended use, desired texture, and pattern.
How many granny squares do I need for a bag?
There is no single number because it depends on the size of each square and the dimensions of the finished bag. Make a layout plan before joining the motifs so you know how many pieces you’ll need.
Can beginners make a granny square bag?
Yes. Granny squares use a repeating construction that can be approachable for beginners who know basic crochet stitches. Joining and handle construction require additional attention.
How do I stop my crochet bag from stretching?
Use a suitable yarn and firm stitch tension, reinforce the handles, and consider adding a fabric lining. Avoid carrying excessive weight.
Can I use acrylic yarn for a crochet purse?
Yes. Acrylic can be used for decorative bags and lightweight accessories. However, the best fiber depends on the bag’s intended purpose and how much structure and durability you need.
Should I line a granny square bag?
A lining is optional, but it can add structure and prevent small items from slipping through open granny-square stitches.
How can I make crochet handles stronger?
Make the handles sufficiently wide, work multiple rows for thickness, and reinforce the points where the handles attach to the bag. A separate sewn-in reinforcement can provide additional support.
Can I change the colors in a granny square bag pattern?
Absolutely. Color changes are one of the easiest ways to personalize a granny square design. You can create a coordinated palette or use several colors for a patchwork effect.
Conclusion
A crochet bag pattern built from granny squares is a wonderful combination of traditional crochet and practical design. With carefully matched squares, secure seams, reinforced handles, and thoughtful finishing details, you can create a handmade market bag, everyday crochet purse, or stylish women bag that reflects your personal taste.
Start with a simple color palette, focus on consistent tension, and take extra care when joining the motifs and attaching the handles. Once you’ve mastered the basic construction, you can experiment with different square designs, sizes, colors, straps, and decorative details to create your own signature bag.